
DPM 1911 Recoil Spring Assembly
Assembly Instructions for Standard Recoil Springs:
ATTENTION: INSTALLATION / SAFETY NOTES:
- Use the DPM Recoil Reduction system Only for the listed types and models of pistol on the packing. DO NOT USE the system on other pistol models. It may cause damage to the recoil system and possibly to the pistol as well.
- Always use one of the included springs (usually the longer spring is the heavy). If include other parts like Spring Plugs, Washers and Spacers Please read the following instructions.
- Our products do not invalidate the existing guidelines concerning the safe and correct way to use your pistol.
- DO NOT USE THIS PRODUCT ON MODIFIED PISTOL. If your pistol is modified internally please contact us for further information or a customized solution.
Attention: DPM Systems Technologies Ltd and its distributors are not responsible for any damage or injury that may happen due to the incorrect placing or use of its products. GENERAL INSTALLATION INSTRUCTIONS:
- Make sure firearm is unloaded.
- Disassemble the pistol.
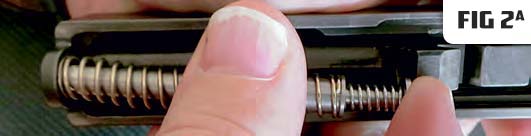
- Replace the standard guide rod with the DPM multi springs system (metallic guide rod) as shown in figure (Fig. 1, 1a, 2, 2a, 3, 3a).


- Ensure that the DPM system is placed in the correct way (Fig. 4).

- Reassemble the pistol.
- Before loading the magazine, rack the slide several times to ensure that the DPM system functions unrestricted.
INSTRUCTIONS FOR DPM RECOIL SYSTEMS EQUIPPED WITH SPRING PLUG OR WASHER:
- . Use Always the Spring Plug or the Washer if your DPM Recoil System is equipped with.
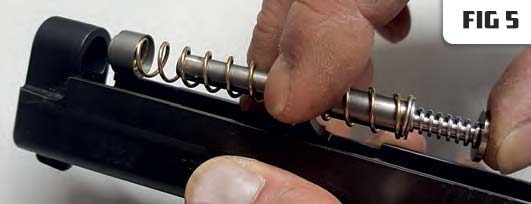
- Insert on the DPM Recoil System an External Spring of your choice with the DPM Spring Plug in the slide pistol (Fig. 5)
- Insert the DPM Washer in the slide pistol and then insert the DPM Recoil System with an External Spring of your choice. (Fig. 6 & 7)
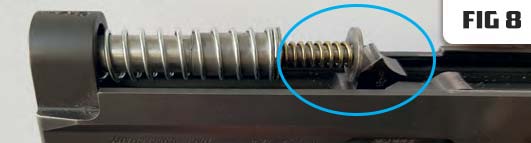
- Place the head of the Recoil System to fit in the correct position of the barrel. (Fig. 8)
Assembly Instructions for 1911 w/ 4" Bull Barrel:
For: 1911 4" Bull Barrel
ATTENTION: INSTALLATION / SAFETY NOTES:
- Use the DPM Recoil Reduction system Only for the listed types and models of pistol on the packing. DO NOT USE the system on other pistol models. It may cause damage to the recoil system and possibly to the pistol as well.
- Always use one of the included springs (usually the longer spring is the heavy). If include other parts like Spring Plugs, Washers and Spacers Please read the following instructions.
- Our products do not invalidate the existing guidelines concerning the safe and correct way to use your pistol.
- DO NOT USE THIS PRODUCT ON MODIFIED PISTOL. If your pistol is modified internally please contact us for further information or a customized solution.
Attention: DPM Systems Technologies Ltd and its distributors are not responsible for any damage or injury that may happen due to the incorrect placing or use of its products.
Parts:
1: Standard Spring Plug (NOT INCLUDED)
2: DPM Spring Plug
3: DPM Recoil Rod
S1, S2, S3: External Springs

Assembly Instructions:
- Remove the factory guide rod according to the pistol manufacturers instructions.
- Insert the Standard Spring Plug in the pistol llide, then place the DPM Spring Plug behind the standard plug.
- Place one(1) External Spring on the DPM Recoil Rod.
- Assemble the slide on the frame.
- Rack the gun a few times to check for any unseen interference and to ensure that the DPM Recoil Reduction System operates unrestricted.
- For easier uninstallation of the DPM System no tool are recommended, only follow the below Figure (Fig 1).

Assembly Instructions for 1911/2011 5" w/ Bull Barrel Recoil Springs:
For: 1911 \ 2011 5" Bull Barrl
ATTENTION: INSTALLATION / SAFETY NOTES:
- Use the DPM Recoil Reduction system Only for the listed types and models of pistol on the packing. DO NOT USE the system on other pistol models. It may cause damage to the recoil system and possibly to the pistol as well.
- Always use one of the included springs (usually the longer spring is the heavy). If include other parts like Spring Plugs, Washers and Spacers Please read the following instructions.
- Our products do not invalidate the existing guidelines concerning the safe and correct way to use your pistol.
- DO NOT USE THIS PRODUCT ON MODIFIED PISTOL. If your pistol is modified internally please contact us for further information or a customized solution.
Attention: DPM Systems Technologies Ltd and its distributors are not responsible for any damage or injury that may happen due to the incorrect placing or use of its products.
Parts:
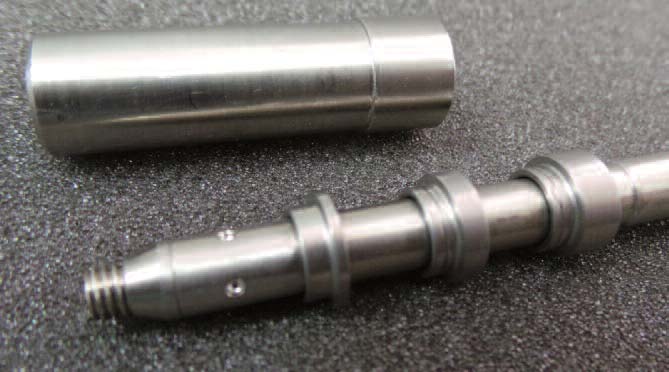
1: Installation Tube
2: Recoil Rod
3: Spring Plug
4: Compression Disc
5: External Springs
6: Rings

Installation Instructions:
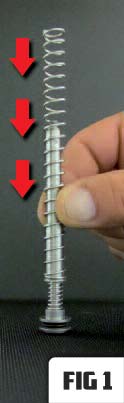
- Place one External Spring on the Recoil Rod (Fig 1).
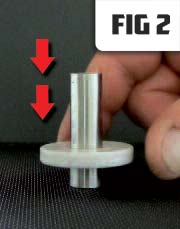
- Place the Compression Disc on the Spring Plug from your pistol (Not Included) (Fig 2).
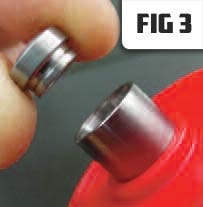
- Insert one Ring in the Spring Plug (Fig 3).
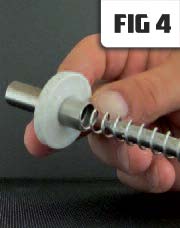
- Insert the Recoil Rod in the Spring Plug (Fig 4).
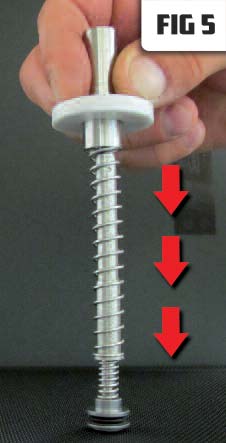
- Compress the Spring Plug with the Compression Disc by pushing down (Fig 5).
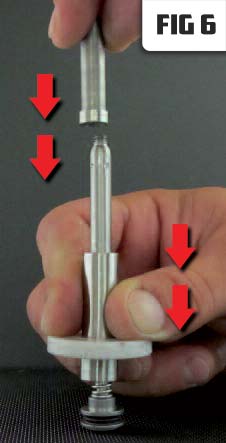
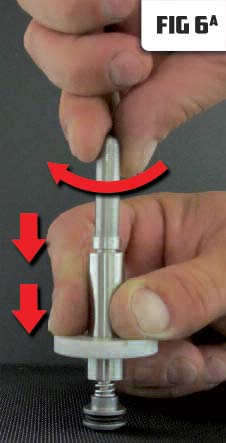
- Insert the Installation Tube (Fig 6) and screw the Installation Tube on the Recoil Rod to temporarily hold the Spring Plug in place (Fig 6a).
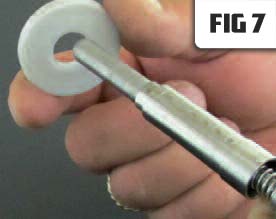
- Remove the Compression Disc and the Recoil Rod is now ready for installation (Fig 7).
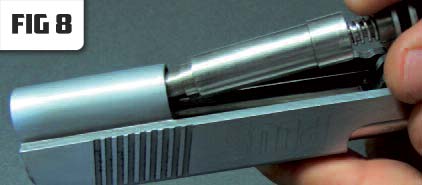
- Insert the Recoil Rod in the pistol slide (Fig 8).
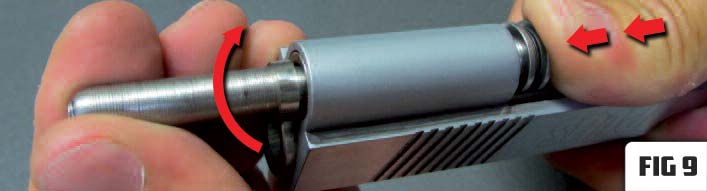
- Using your thumb, push the DPM Rod forward to compress the Recoil System and unscrew the Installation Tube while continuing to hold the rod compressed (Fig 9).
- Remove the Installation Tube and slowly and carefully release the rod allowing it to slide back and lock onto the barrel (Fig 10).

- Assemble the Slide on the Frame and function (open and close) the slide several times by hand to Ensure that the DPM Recoil Reduction System operates unrestricted.
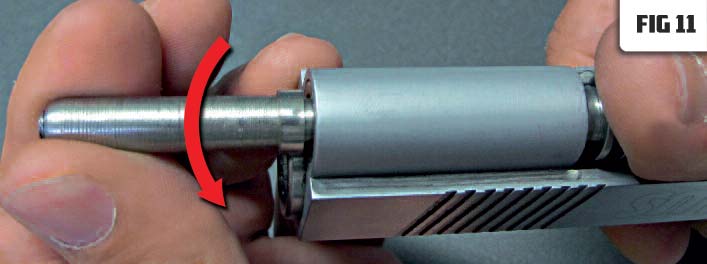
- To Remove the Recoil System, Using your thumb, push the DPM rod forward to compress the recoil System and Screw on the Installation Tube (Fig 11).
- Follow steps 6 to 1 in reverse order to complete disassembly.
IMPORTANT!: Always use only one Ring inside the Spring Plug. Insert the Ring like the example below:
Assembly Instructions for 1911 /w 5" Bushing Barrel Recoil Springs:
For: 1911 5" Bushing Barrel
ATTENTION: INSTALLATION / SAFETY NOTES:
- Use the DPM Recoil Reduction system Only for the listed types and models of pistol on the packing. DO NOT USE the system on other pistol models. It may cause damage to the recoil system and possibly to the pistol as well.
- Always use one of the included springs (usually the longer spring is the heavy). If include other parts like Spring Plugs, Washers and Spacers Please read the following instructions.
- Our products do not invalidate the existing guidelines concerning the safe and correct way to use your pistol.
- DO NOT USE THIS PRODUCT ON MODIFIED PISTOL. If your pistol is modified internally please contact us for further information or a customized solution.
Attention: DPM Systems Technologies Ltd and its distributors are not responsible for any damage or injury that may happen due to the incorrect placing or use of its products.
WARNINGS: Use ONLY on Standard 1911 Pistols with BUSHING. Before proceeding with installation make sure the pistol is unloaded and follow the operating and safety instructions provided by the pistol manufacturer. Remove the Factory Guide Rod according to the pistol manufacturers instructions. ALWAYS wear eye protection during installation or removal of this item.
Parts:
1: Spring Plug
2: DPM Recoil Rod
3: External Springs
L: Secondary Spring

Installation Instructions:
- Remove the factory guide rod according to the pistol manufacturers instructions.
- Insert the DPM Recoil Rod in the pistol slide.
- Assemble the slide on the frame.
- Place one External Spring on the DPM Recoil Rod.
- Place the DPM Spring Plug and use the bushing tool to turn and lock the bushing according the pistol manufacturers instructions.
- Rack the gun a few times to check for any unseen interference and to ensure that the DPM Recoil Reduction System operates unrestricted.
IMPORTANT: Frequently Lubricate the Secondary Spring (L) and the Recoil Rod (2).