DPM AR-15 Recoil Buffer Assembly
Assembly Instructions for AR-15 Recoil Buffer:
INSTALLATION / SAFETY NOTES:
- Use the DPM Recoil Reduction system Only for the listed types and models of firearms on the packing. DO NOT USE the system on other models. It may cause damage to the recoil system and possibly to the gun as well.
- Always use one of the included springs (usually the longer spring is the heavy). If include other parts like Spring Plugs, Washers and Spacers Please read the following instructions.
- Our products do not invalidate the existing guidelines concerning the safe and correct way to use your pistol.
- DO NOT USE THIS PRODUCT ON MODIFIED FIREARMS. If your gun is modified internally please contact us for further information or a customized solution.
Attention: DPM Systems Technologies Ltd and its distributors are not responsible for any damage or injury that may happen due to the incorrect placing or use of its products.
Parts:
1: Axel
2: Central Tube
3: Counterweight
4: Counterweight Spring
5: Buffer Tube
6: Absorbing Spring
7: Absorbing O-ring
8: Rubber head
9: Stopper
10: Safety Pin
11: Counterweight O-ring
12: Tool
- Place the Buffer Assembly in a firm surface and compress the Rubber Head down to appear the Stopper and by using the Tool remove the Safety Pin from the Stopper bore (Fig. 1, 2 & 3).
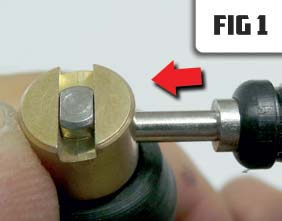
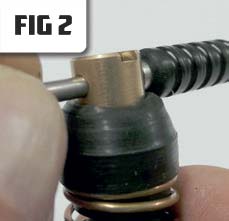
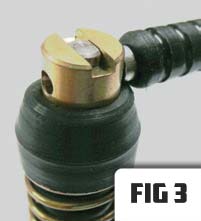
- The Buffer Assembly can stay for a while with the Tool, ready for the next step (Fig. 3).
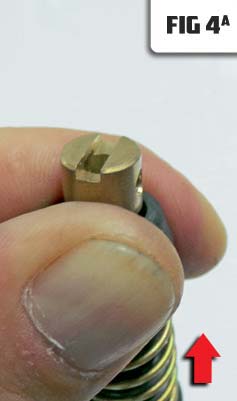
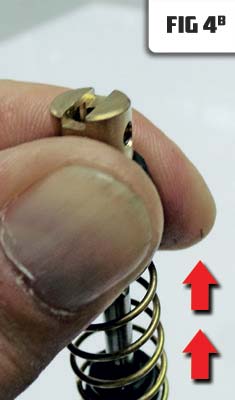
- Compress the Rubber Head again, take the Tool off and carefully let the Spring to get uncompressed (Fig. 4a, 4b & 4c). Now the Bu er Assembly is completely disassembled, ready for cleaning and adjustments.

- Assemble the Buffer Parts with the Correct Order from number 1 to 10 as showed in the Parts Picture above, choose different Springs and Counterweight if you wish to adjust the Buffer Assembly and finally compress the Rubber Head to appear the Axel and place the Stopper on the Axel top (Fig. 6).
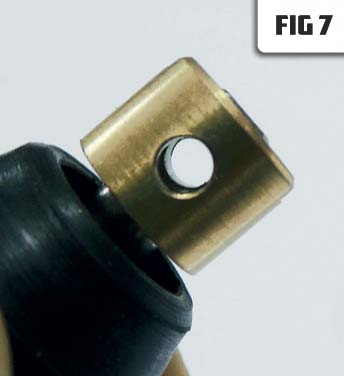
ATTENTION: The Stopper has to be assembled with the Axel and interlock together so both bores are aligned (Fig. 7).
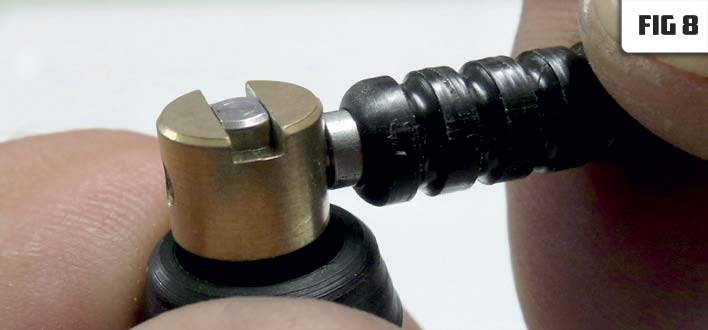
- Insert the Tool through the Stopper and Axel bore to secure temporarily the Buffer Assembly (Fig. 8).
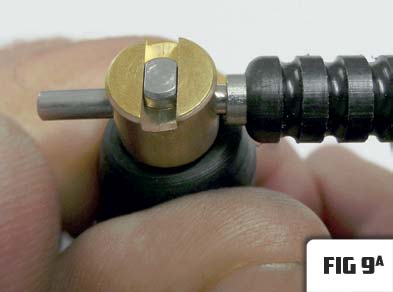
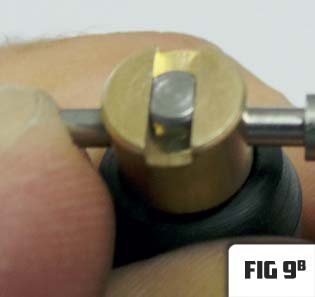
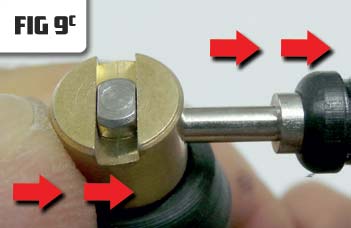
- Insert the Safety Pin to the other side of the Stopper bore, push to fully penetrate and at the same time take o the Tool from the Stopper (Fig. 9a, 9b, 9c).
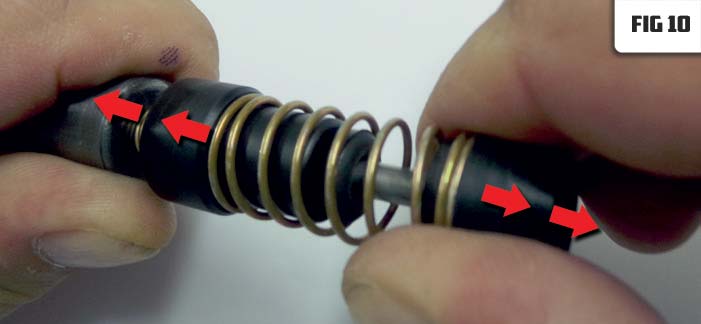
- Uncompress the Rubber Head to fully cover the Stopper with the Safety Pin inside it. Finally, pull the Rubber Head to fully cover the Stopper (Fig. 10). Now the Buffer Assembly is now ready for use.